
In this blog post we will discuses how to make solar panel for school project from the scratch to the end. So if you are looking for finding a way of how to make solar panel for school project! Then I’m pretty much sure that this blog post will definitely help you a lot for making it.
Creating a solar panel for a school project is a fun and educational activity. It helps students understand renewable energy and the basics of how solar panels work. This guide will walk you through the steps and materials needed to make a simple solar panel.
Just follow the process mention below and you will good to go..
Materials Needed:
Before you start, gather all the necessary materials. Here’s a list of what you’ll need:
- Solar Cells: Small photovoltaic cells. You can buy them online or at an electronics store.
- Soldering Iron and Solder: For connecting the cells.
- Tabbing Wire: Used to connect the solar cells together.
- Bus Wire: Connects rows of solar cells.
- Flux Pen: Helps the solder stick to the cells.
- Plywood Board: As a base for the solar panel.
- Glass or Plexiglass: To protect the solar cells.
- Silicone Sealant: For sealing the panel.
- Multimeter: To measure the voltage and current.
- Diode: Prevents the current from flowing back into the panel at night.
- Wire Cutters and Strippers: For preparing the wires.
- Epoxy: To glue the cells onto the plywood.
Making a Solar Panel for a School Project Step-by-Step Process:
Here is a step by step process of how to make a solar panel for school project:
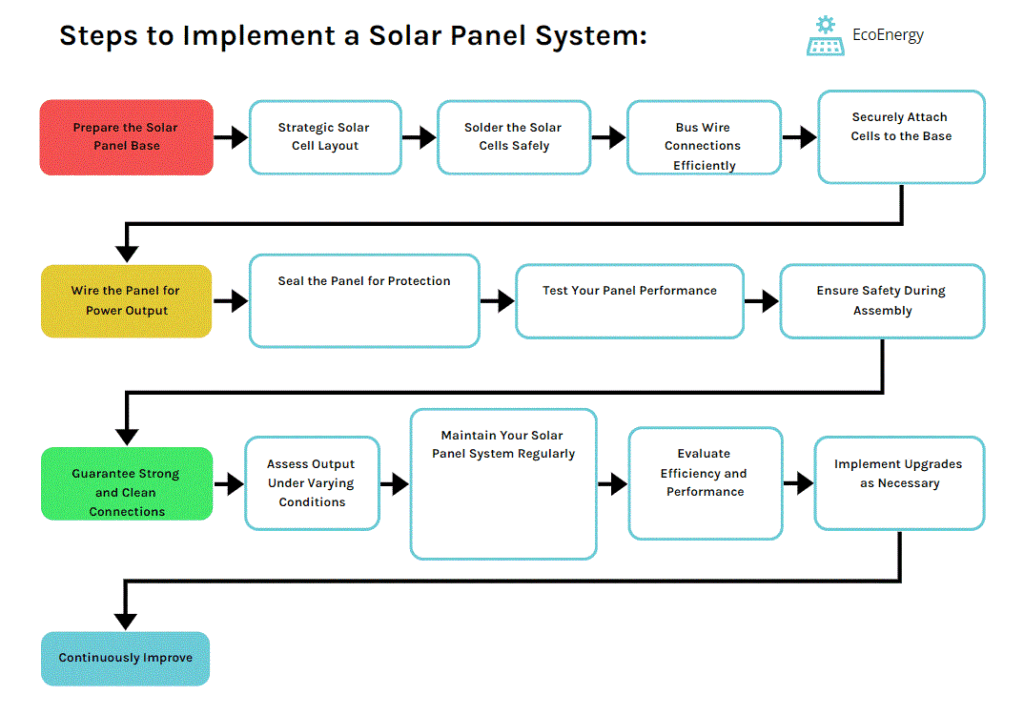
1. Prepare the Base:
So at first you have to cut the plywood board to the size you need. And then sand the edges to make them smooth. This will be the base of your solar panel.
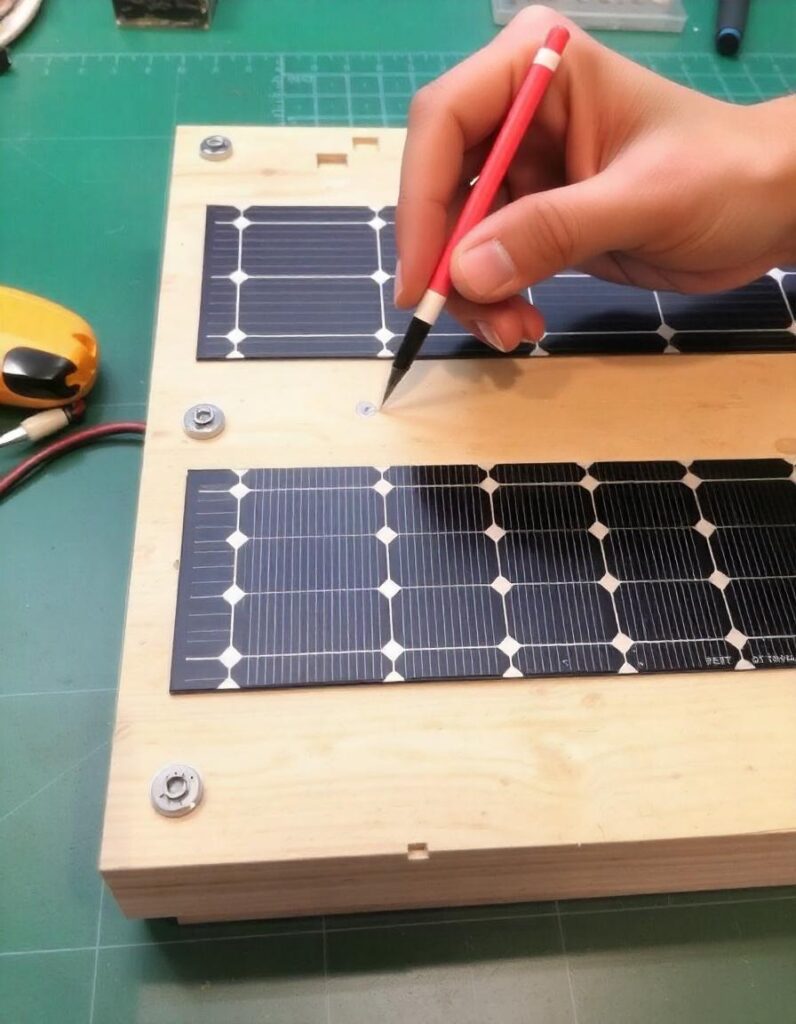
2. Arrange the Solar Cells:
Now lay out the solar cells on the plywood to see how they will fit. Solar cells are fragile, so handle them with care. Now arrange them in rows, and leave small gaps between each cell.
3. Soldering the Cells:
Now understand this process very carefully:
- Use the flux pen on the solder points of the cells.
- Cut the tabbing wire into strips, long enough to connect the cells.
- Heat the soldering iron and carefully solder the tabbing wire to the front of the first cell. This will be the negative side.
- Solder the other end of the tabbing wire to the back of the next cell (positive side).
4. Connecting Rows with Bus Wire:
Once you have several rows of cells soldered together, connect them using bus wire.
- Solder the tabbing wire from the end cell of one row to the start cell of the next row.
- Continue until all rows are connected.
5. Attach Cells to the Plywood:
Use epoxy to glue the cells to the plywood. Be gentle to avoid breaking the cells.
6. Wiring the Panel:
After all done you have to do these things
- Solder the bus wire to the terminal points. One will be the positive terminal, and the other will be the negative terminal.
- Attach the diode to the positive terminal to prevent reverse current.
7. Covering the Panel:
Now you have to cover the panel to protect it.
- Carefully place the glass or plexiglass over the cells.
- Use silicone sealant around the edges to seal the panel and protect it from moisture.
8. Testing the Panel:
Now all done and it is time to test your panel whether it is working or not?
- For that use the multimeter to check the voltage and current.
- And place the panel in sunlight and measure the output.
Tips for Success
- Safety First: Always be careful when using the soldering iron and handling the glass.
- Precision: Make sure your solder connections are strong and clean.
- Testing: Test your panel in different lighting conditions to understand its performance.
Understanding Solar Power
Solar panels work by converting sunlight into electricity. Solar cells are made from silicon and other materials that create an electric current when exposed to light. This is known as the photovoltaic effect.
Educational Benefits
Making a solar panel teaches us several things like:
- Basic electronics and soldering skills.
- Understanding of renewable energy.
- Problem-solving and critical thinking.
Conclusion
Making a solar panel is a rewarding project that combines creativity with science. By following these steps and taking care with each part of the process, you can create a functional solar panel. That will help you to power of renewable energy. This project not only helps in learning about solar energy but also encourages a hands-on approach to science education.
Read also: Which Type of Solar Panel is Best?